Anyone who has been following my blog, or the CGEM yahoo group, might know that I have had a really tough time comprehending polar alignment – both the full principles, and the actual technique.
I mean – it’s not hard to comprehend the part about the mount needing to be aligned with the north celestial pole in order for the scope to be able to track in compensation for the earth’s rotation. But what this means, fully, for a german equatorial mount is another thing, and understanding the various techniques and their different functions and applications can be really, truly hard for a newcomer.
I think I’ve got it, though, and the key is summed up in this: The entire purpose of Polar Alignment is to get the altitude and azimuth axes into position. Thus, the ‘home position’ for RA/DEC (i.e. those lined up arrows) becomes relevant for tracking only relative to accurately positioned alt/az axes.
The Polar Axis Finder instructions are fine – if read and re-read thoroughly. But it leaves out the most important step/concept in being able to move to the Hand Controller (HC) and run through the 2-star alignment procedure (with however many calibration stars), or the “All-Star” procedure (p37 of the manual) once Polar Alignment has been achieved using the polar finder scope: Return the RA/DEC axes to the ‘home position’ i.e. with all the arrows aligned.
The alt-az axes need to be in position for the home position to be useful.
So the step by step routine (assuming that the Optical Axis of the Polar Scope has been aligned already):
- Rough align the tripod north, and level.
- Many recommend against assembling the OTA fully at this point: for both weight and range of motion. Some suggest a full assembly to avoid messing up polar alignment, since the full weight can cause bowing in the tripod legs. I’ll have to see which works for me.
- The Latitude Scale should be set to your latitude.
- Rotate DEC so that you can see through the bore hole.
- – rotate the RA axis until the big dipper (northern hemisphere) is in the same orientation within the polar axis finder scope reticule as it is within the sky. This is a nice video.
– Another method is to control the rotation of RA according to the RA setting circle and polar finder scope metal collar with hour angles on it. My scope does not have an RA setting circle, so the collar is useless. Here is a good link that Gary A. emailed that describes it, along with the rest of the routine.
– Yet another method is the Kochab’s Clock method, described here. With this method, line up Polaris and Kochab along the unloaded counterweight bar.
- Adjust the alt/azimuth axes until Polaris is within the small circle meant for it. Then lock them down.
- Return the RA and DEC to home (in bold because this is the part that kept tripping me up). Power up the scope, and run through the 2-star alignment, and then, if preferred, the “All Star” procedures.
- (Kevin adds something about re-calibration at this stage, and ‘display align’, but I’m not there yet in my learning curve!)
That is it. Of course, I’ll post again on the topic when the snow melts and the temperature is above freezing.
Thank you. Have you gotten any further along? I’m about to try to align mine for the first time tomorrow (cgemedgehd800). Please let me know.
Hi Matthew, good luck!
I haven’t gotten out yet because it is still snowing (well, for five minutes this afternoon)! Opposition is Saturday so I am preparing for a chilly attempt. Good luck. Post back with your results! Are you on the cgem list?
Still snowing?! I’m sorry. We are just now getting some clear days/nights, but I’ve snuck out a few nights with variable clouds and have seen Saturn, Jupiter, and our lady the moon. It looks like we will have clouds for opposition, but I am having some friends over tomorrow to take a look. I am not on the CGEM list? How do I join?
Take a look at my first photos, Jupiter and the moon (sans moon filter, doh): lfsnfs.blogspot.com
Will do. The cgem list is a yahoo group and email list serve. Lots of great info there.
I’ve never used a yahoo group or list serve… I feel kind of stupid, could you point me in the right direction (links or something?) Do you only need to align your polar finder with your optical axis (the part where you look at a terrestrial object and move the tube holder from side to side, aligning on an object) once? Because I don’t have any terrestrial objects visible from my backyard that are even 100 yards away, let alone several 100s of yards away. So, what I need to know, is, can I align my polar finder with my optical axis, then move my tripod/mount? Or do I need to align it everytime I use it? Thanks.
Hi again,
Here is the link to the CGEM group: http://tech.groups.yahoo.com/group/CelestronCGEM/ = follow the instructions for subscribing. I have found the archive of messages to be really helpful.
Aligning the polar finder with the optical axis needs only be done once – with the finder secured in the mount, and the cover screwed back on when not in use, in theory it should be stable and set. I’m not completely convinced that the setting screws wouldn’t jiggle around, so I imagine that periodically checking the alignment might be a good thing. So, you do it, and then are free to disassemble and reassemble the scope anywhere for observation.
Good luck!
Awesome. Thank you so much for your help. Let me know how your viewing goes. I will posting the photos/video I take tonight to my blog.
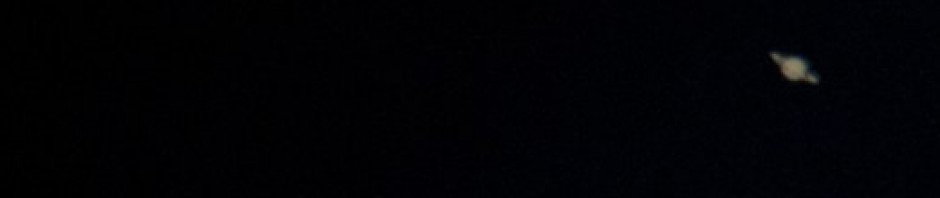
Risa! Just got around to looking at more of your page! Super awesome! I have been asked to do some art for an outerspace themed art show this July. I guess I would have to read your whole page, but how do you get such high resolution/large pictures of Saturn with your 8″ cgem? I think we have the same one, the edgehd 800. Saturnm even with a 6mm and 2x barlow, still looks tiny to me…. Jupiter, of course, is more reasonably sized. Let me know if you’re ever in the pacific NW!
Keep reading! My 2012 image was taken using the scope at the David Dunlap Observatory – Canada’s largest optical scope, 74″/1.88m. Lucky me! My stacked shots are from video taken with a dslr. The planet was too big for my orion planetary imager, if you can imagine, even with the reducer. I have not yet imaged with the cgem. What imaging equipment are you using?
I will! Thanks for documenting it all. That’s really cool you got to use such a huge telescope. When you make stacked shots from your DSLR what program do you use to stack them? Also, what are you attaching your camera too if you haven’t used your CGEM?
I do not understand how Saturn could be too large to image with your Orion.? What telescope are you using it with? How can it be taking pictures so much more magnified than my Celestron NexImage 5? I want big saturns (and jupiters, etc.) :(.
I have a Canon 60Da (a = astrophotography) DSLR, and the aforementioned NexImage 5 (I’m just starting to experiment with the NexImage, would love advice if you have any.)
I got out the last two nights and checked out Jupiter, Saturn, and the Moon both nights! 🙂 I really hope you get out for opposition. If its clear out here I will join you and we will be hanging out in our own Temporary Autonomous Zone (google it;). I think I got my mount polar aligned nearly perfectly. It went to everything perfectly and tracked great.
Which is going to make me tell you a funny story. First night I took my telescope out I didn’t plug it in, wanted to just learn what I was working with. I saw Saturn, for about three seconds, then about 15 minutes finding it again, then 3 seconds… I did finally get a short video of it… But, wow, hand guiding is hard.
I hope you don’t mind the questions and familiarity. Thanks again!